
Connect an AI agent
Turn on AI agent access, connect Claude or Codex through the shotomatic bridge, and approve the agent once.
Updated November 15, 2026
On this page
AI agents such as Claude and Codex can use Shotomatic on your Mac or Windows PC through MCP, the Model Context Protocol. An agent can capture, read your Capture History, build Documents, and export, while you stay in control of what it may do.
Access is off by default. Nothing is reachable until you turn it on and approve each agent.
Connect with one click
- Open Settings (
Command + ,, orCtrl + ,on Windows) and select AI agents. You can also choose Help > Connect an AI Agent…. - Under Connect an agent, select Connect next to your agent. Shotomatic lists Claude and Codex (ChatGPT) when it finds them on your computer. Claude covers both Claude Code and the Claude app.
Shotomatic adds itself to that agent's settings and turns on Let AI agents use Shotomatic. The agent is also allowed right away, so it works without an approval card: Claude Code and Codex from their next session, and the Claude app after you restart it.
After connecting, the agent's row shows Added with two buttons. Reconnect adds Shotomatic to that agent again, and Copy prompt copies a first request to paste into the agent: "Check Shotomatic's status and tell me what you can do with it." Under the list, What agents can do opens the guide page with more requests.
Connecting this way needs no Node and no terminal command. The rest of this page covers other agents and setting things up by hand.
Before you start
- Use a version of Shotomatic that includes AI agents in Settings.
- For setup by hand, install Node 18.3 or later. The agent starts a small bridge package named
shotomaticwithnpx. Connect in Settings does not need it. - On a Mac, grant Screen Recording and, for key presses, Accessibility as described in macOS permissions. Agents use the same permissions as you do. Windows needs no permissions.
Turn on access
- Open Settings (
Command + ,, orCtrl + ,on Windows) and select AI agents. You can also choose Help > Connect an AI Agent…. - Turn on Let AI agents use Shotomatic.
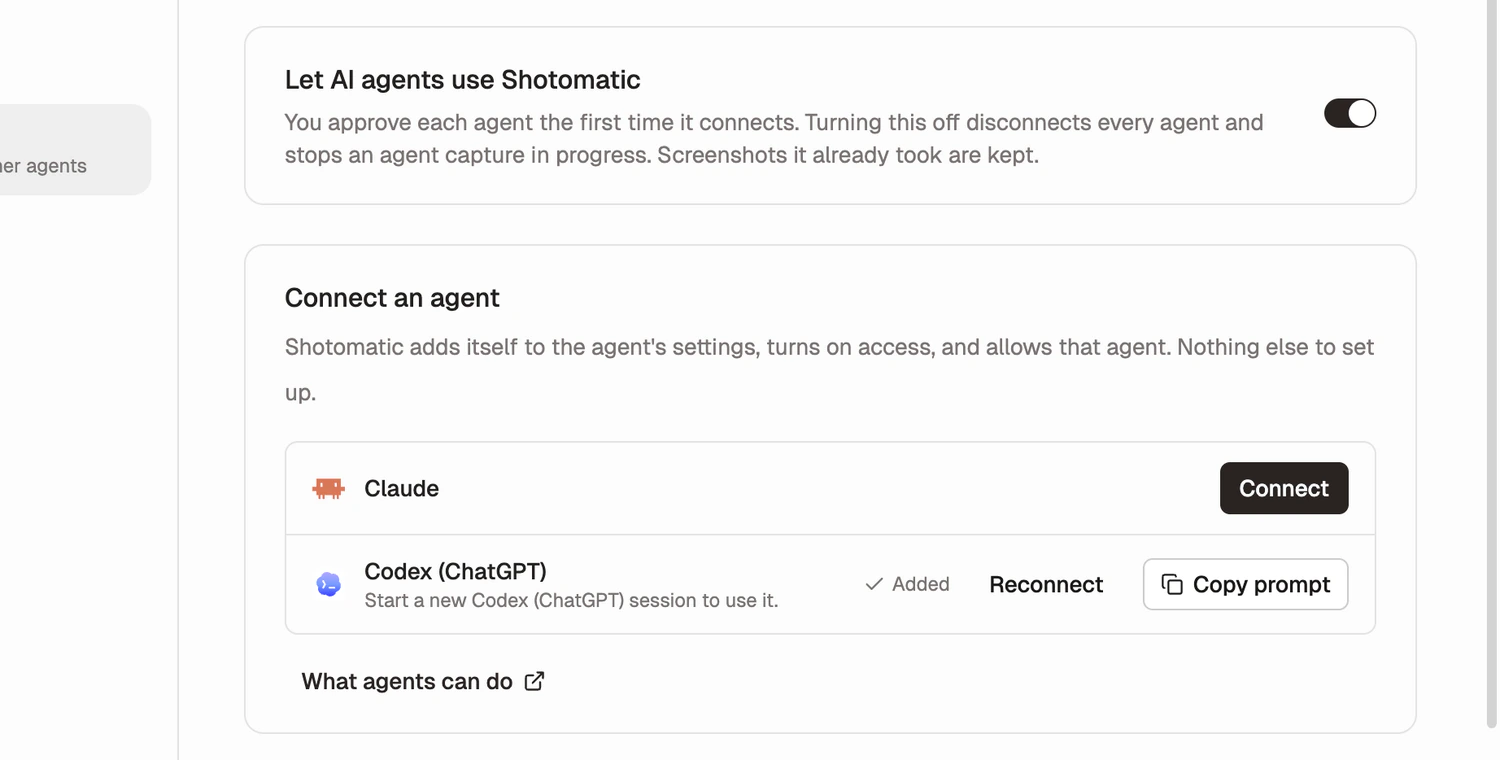
Turning the switch off disconnects every agent and stops an agent capture in progress. Screenshots it already took are kept.
Add Shotomatic to your agent
The client starts the bridge for you. The command is the same everywhere: npx -y shotomatic mcp.
Claude Code
claude mcp add shotomatic -- npx -y shotomatic mcp
Claude Desktop — add this to claude_desktop_config.json (Settings > Developer > Edit Config; on Windows the file is in %APPDATA%\Claude), then restart Claude Desktop:
{
  "mcpServers": {
    "shotomatic": {
      "command": "npx",
      "args": ["-y", "shotomatic", "mcp"]
    }
  }
}
Codex — add this to ~/.codex/config.toml:
[mcp_servers.shotomatic]
command = "npx"
args = ["-y", "shotomatic", "mcp"]
If Shotomatic is not running when the agent connects, the bridge opens it in the background.
Cursor, VS Code, Gemini CLI, Zed and other MCP clients use the same command; see Connect other AI agents.
Approve the agent once
The first time an agent connects, Shotomatic shows Allow "agent name" to use Shotomatic? and, on a Mac, bounces its Dock icon. The card lists what the agent can do:
- See which windows are open and take screenshots of them.
- Capture a window and press keys in it, for example to turn pages.
- Read your Capture History and Documents.
- Edit Documents and export them.
- Capture websites and record click-by-click guides.
- Change capture and export settings.
It also says that the agent asks you before it deletes anything and cannot change your license or install updates.
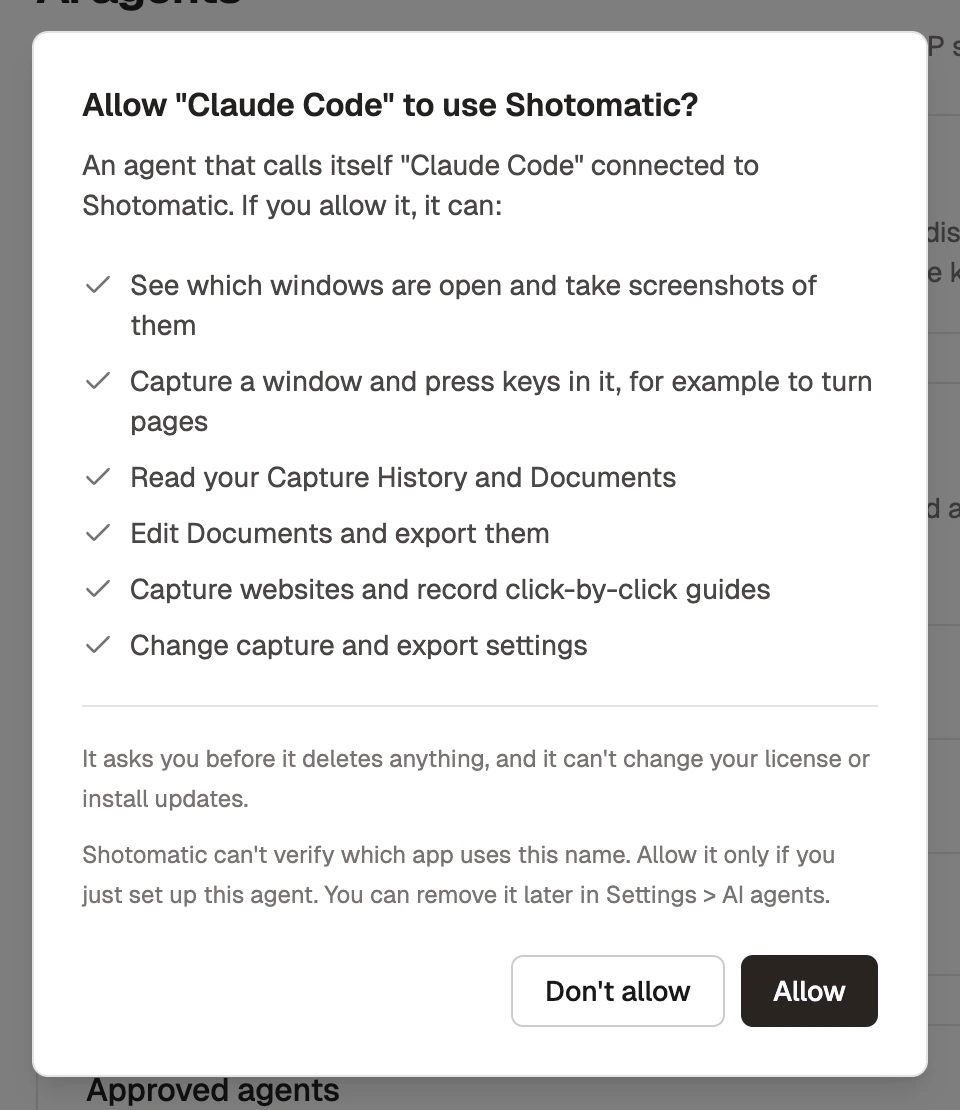
Select Allow to approve the agent or Don't allow to refuse. Until you answer, the agent can only read its status, and its other requests are refused. If you refuse, Shotomatic asks again the next time that agent connects.
See who is connected
While an agent is connected, a status row at the bottom of the window shows its name, for example Claude Code connected, or the number of connected agents. Select Disconnect to close every agent connection. Disconnecting does not remove an approval; the agent can connect again.

Remove an approved agent
Open Settings > AI agents. Approved agents lists each agent with its approval date and a Connected badge while it is connected. Select Remove to cancel the approval and disconnect it. It must be approved again to reconnect. The Claude app is listed as Claude Desktop, separate from Claude Code.
Continue with approvals and confirmations.