
Quick start
Install Shotomatic, grant the permissions you need, and complete your first automated screenshot session.
Updated August 10, 2026
On this page
Shotomatic captures a screen, app window, or selected area on a schedule. A basic session only needs a stop condition, an interval, and a capture source.
Download and open Shotomatic
- Go to the Shotomatic website and download the build for your Mac.
- Choose Apple Silicon for Macs with an M-series chip. Choose Intel for an Intel-based Mac.
- Open Shotomatic.
The app opens on Auto Capture. You can return to this screen at any time with Command + 1.
Grant macOS permissions
Shotomatic checks permissions before it starts a capture.
| Permission | What it enables |
|---|---|
| Screen Recording | Capturing displays and app windows |
| Accessibility | Automatic keypresses, window focusing, and Action Capture clicks |
Select Open System Settings beside a missing permission, enable Shotomatic in System Settings, then return to the app and select Refresh Status. See macOS permissions for the full recovery flow.
Configure the first session
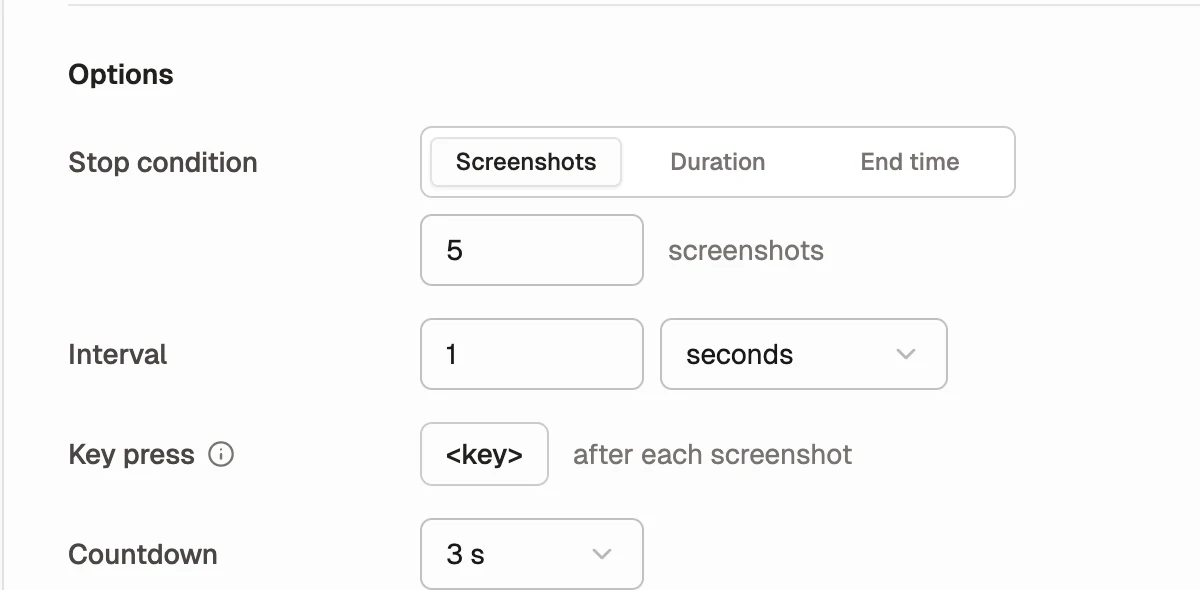
On Auto Capture, keep the first run simple:
- Leave Stop condition set to Screenshots and enter
5. - Leave Interval at
1 second. - Leave Key press empty.
- Keep the Countdown at
3 sso you have time to switch to the target.
The default settings produce five screenshots, one second apart.
After this test works, add Right Arrow to Key press to advance a page after each screenshot. See How to Save Ebook Pages as a PDF on Mac for reader setup, timing, page-turn automation, and PDF export.
Choose a capture source
Select the source button at the bottom of the setup screen. Its label reflects the current source type, such as Select screen or Select window. Choose the source that matches the task:
- Screens captures one selected display for the whole session.
- Windows captures one selected app window. Shotomatic brings that window forward when capture starts.
For Screens or Windows, select a thumbnail and then select Start Capture. Use the countdown to put the target in its intended starting state.
For a smaller part of the screen, select Custom Area. The picker reopens the saved area when one exists; otherwise, it starts with a centered 16:9 selection. Move or resize it, or press Escape to clear it and draw a new area. Select Start Auto Capture in the overlay.
Read screens, windows, and custom areas for details about each source.
Run and finish the capture
The countdown begins after you confirm the source. Shotomatic then saves frames until it reaches the stop condition.
During the run, the floating capture toolbar shows progress toward the stop condition. Use Pause capture to hold the session or Finish capture to end it immediately. Frames already captured remain available.
Review the result
New frames appear in the screenshot panel while the session runs. When the run finishes, the panel shows Capture complete and the number of screenshots. Use Select all or the checkbox on each thumbnail to choose which frames to keep.
The frame selection applies to ZIP, Images (PNG or JPG), PDF, and MP4 exports. Create Document uses the whole session, including frames that are not selected for export. You can also open the export folder from this panel.
Completed sessions also appear under Capture History, where you can reopen them later. See Capture History and export formats for the next steps.