How to Take a Screenshot on Windows 11 and 10: Every Shortcut
Every way to take a screenshot on Windows 11 and 10: Snipping Tool, Print Screen, Windows + Print Screen, Alt + Print Screen, and Game Bar, with what each one saves.

Windows has five built-in ways to take a screenshot, and they don't all do the same thing. Some save a file, some copy to the clipboard, and one opens a capture bar where you pick the area. Knowing which is which saves you from hunting for a screenshot that was never saved.
This guide starts with a table of every shortcut, then covers capturing part of the screen, one window, the whole screen, a video, and a delayed snip, and what to do with the result.
Windows screenshot shortcuts at a glance
Microsoft's list of Windows keyboard shortcuts and its Snipping Tool guide describe these:
| Shortcut | What it captures | Where the result goes |
|---|---|---|
| Windows + Shift + S | Rectangle, window, full screen, or freeform | The clipboard, and Pictures > Screenshots while automatic saving is on |
| Print Screen (Windows 11) | Usually opens the same capture bar | Same as Windows + Shift + S |
| Print Screen (Windows 10) | The whole screen | The clipboard only |
| Windows + Print Screen | The whole screen | A PNG file in Pictures > Screenshots |
| Alt + Print Screen | The active window | The clipboard only |
| Windows + Shift + R | A screen recording (video snip) | Your Screen Recordings folder |
| Windows + Alt + Print Screen | The game or app in front, through Xbox Game Bar | A PNG file in Videos > Captures |
On some laptops, Print Screen shares a key with another function, so you may need to hold Fn as well. If you can't find a screenshot afterward, our guide to where screenshots go on Windows lists every place to check.
Capture part of the screen
Windows + Shift + S is the shortcut most people want. It dims the screen and shows the Snipping Tool capture bar at the top:
- Press Windows + Shift + S.
- Choose a mode in the bar: Rectangle, Window, Full screen, or Freeform.
- For Rectangle or Freeform, drag around the area. For Window, click the window.
The snip is copied to the clipboard, so you can paste it right away with Ctrl + V. A notification also appears; select it to open the snip in Snipping Tool for markup. On most Windows 11 PCs, the Print Screen key opens the same capture bar. Whether it does depends on a keyboard setting, which you can find by searching Settings for "Print screen".
Capture one window
You have two options:
- Alt + Print Screen copies the active window to the clipboard without any selection. Click the window first so it's active.
- Windows + Shift + S, then Window mode, lets you click any visible window, which is handy when the window you want isn't the active one.
Neither saves a file on its own, except that Snipping Tool keeps a copy in Pictures > Screenshots while its automatic saving is on.
Capture the whole screen
- Windows + Print Screen saves the whole screen straight to Pictures > Screenshots as a PNG, without opening anything.
- Print Screen on Windows 10, or on a Windows 11 PC where it doesn't open Snipping Tool, copies the whole screen to the clipboard.
- Windows + Shift + S, then Full screen, does the same through Snipping Tool.
Record a video snip
Snipping Tool also records the screen. Press Windows + Shift + R, select the area to record, and start recording. When you select Stop, Microsoft's Snipping Tool explainer says the video is saved to your Screen Recordings folder automatically. For games and apps, Xbox Game Bar (Windows + G) has its own recorder.
Take a delayed screenshot
If an open menu or tooltip disappears when you press a shortcut, use a delay. Open Snipping Tool, choose a delay such as 5 seconds, pick a mode, and start a new snip. Open the menu during the countdown, and capture it when the screen turns gray. Our delayed screenshot guide covers the steps and the fixes when it doesn't work.
Edit, copy, or pull text from a screenshot
When you open a snip in Snipping Tool, you can:
- Mark it up with a pen, highlighter, or shapes, and crop it.
- Copy it again with Ctrl + C to paste into an email, document, or chat.
- Pull out text with Text actions, which recognizes the text in the snip on your PC so you can copy it.
For a long web page or chat that doesn't fit on screen, none of these shortcuts scrolls. Our guide to scrolling screenshots on Windows shows the browser and stitching methods.
When you need dozens of screenshots in a row
Every shortcut above takes one screenshot per press. That's fine for a few, but it gets slow when you're documenting a long process or capturing the same window every few seconds.
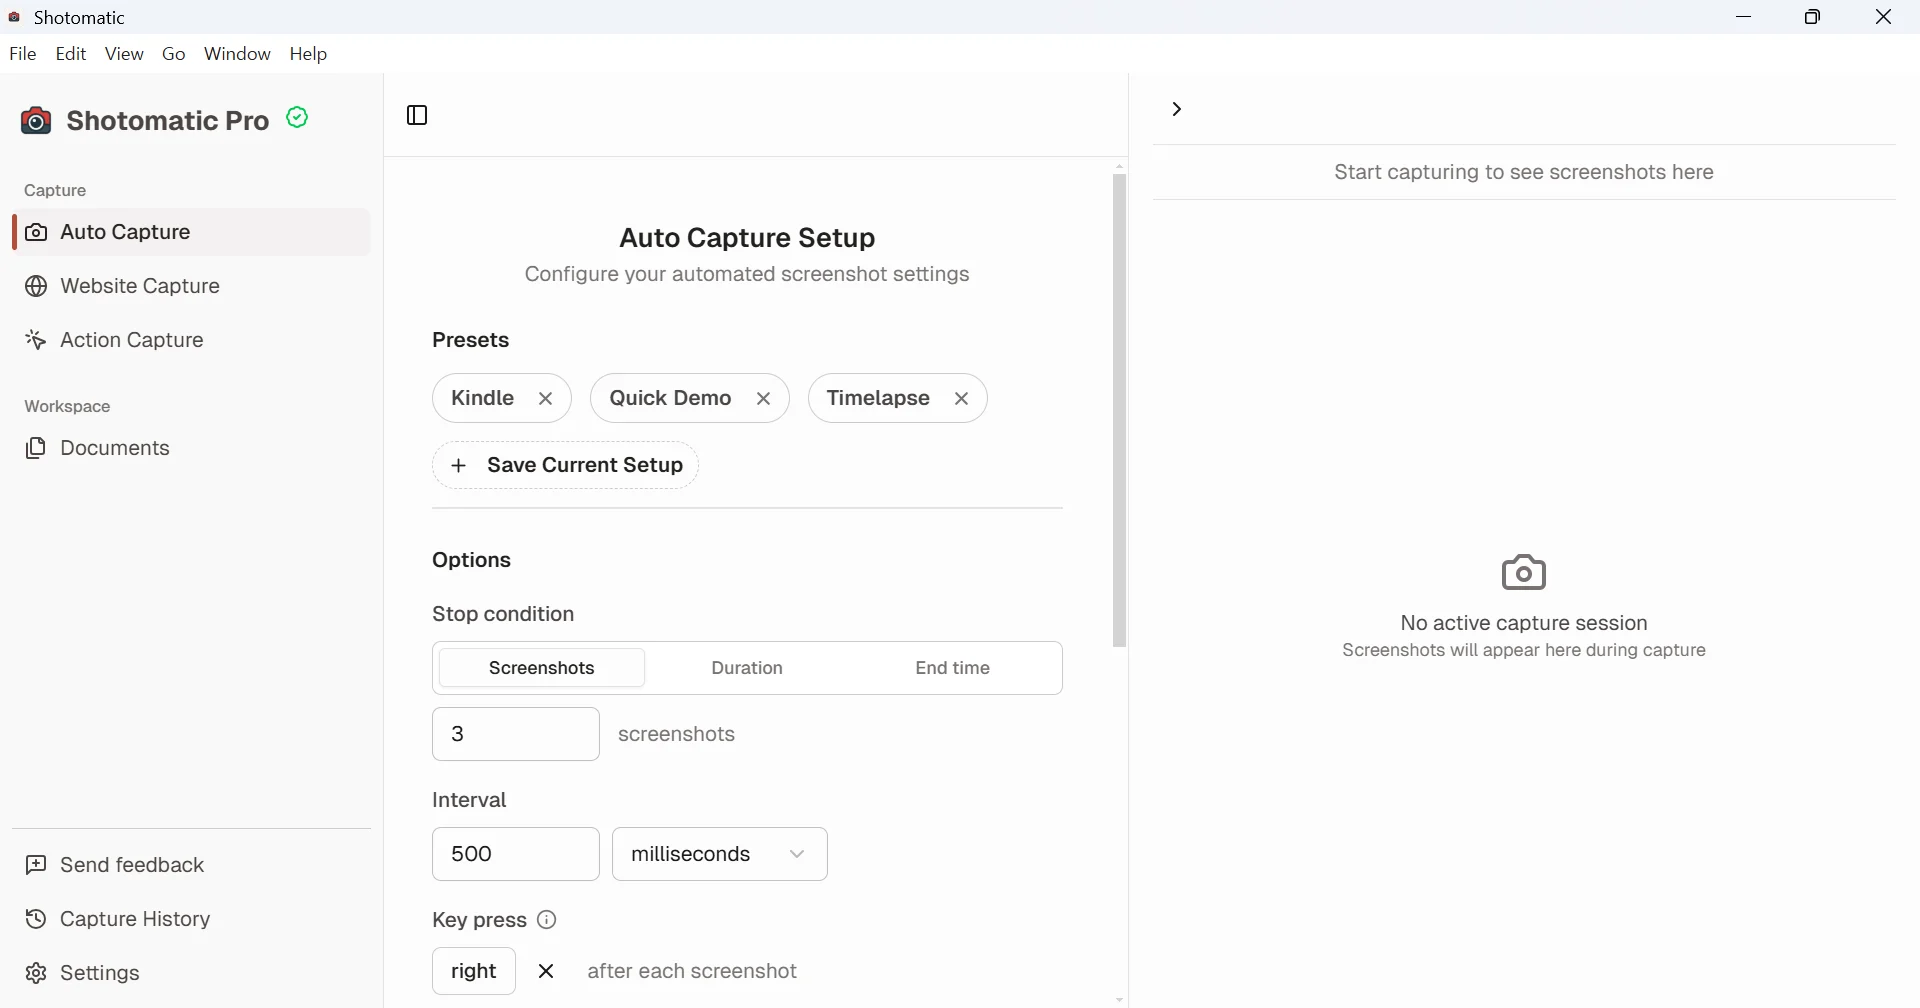
Shotomatic runs on Windows 10 and 11 and handles those cases:
- Auto Capture saves a screen, a window, or a custom area at an interval you set, until it reaches a screenshot count, a duration, or an end time. See screenshot automation on Windows.
- Action Capture saves a screenshot each time you click and turns the steps into a guide you can edit and export. See how Action Capture turns clicks into a guide.
For everyday screenshots, the built-in shortcuts are enough. If you want more editing or upload options, our Snipping Tool alternatives guide compares free and paid tools.
Frequently Asked Questions
Turn repeatable screenshots into finished work
Shotomatic captures, organizes, and exports screenshot sessions on Mac and Windows.
Related posts
See more postsWhere Do Screenshots Go on Windows? Find Them by Shortcut
Windows saves screenshots to Pictures > Screenshots, but some shortcuts only copy to the clipboard. Find a missing screenshot by the keys you pressed.

How to Take a Delayed Screenshot on Windows with Snipping Tool
Set a Snipping Tool delay to capture open menus and tooltips on Windows, and what to use when you need a screenshot every few seconds instead.

How to Take a Scrolling Screenshot on Windows
Snipping Tool can't take a scrolling screenshot. Save a whole web page from Edge, Chrome, or Firefox, or stitch overlapping captures of any app window.

Snipping Tool Alternatives for Windows (2026)
What Snipping Tool already does on Windows 11, where it stops, and when ShareX, Greenshot, Snagit, or Shotomatic is the better screen capture tool.
