How to Turn Existing Screenshots into a Step-by-Step Guide on Mac
Import existing screenshots into an ordered guide on Mac, add clear page instructions and annotations, then export the result as PDF or images.
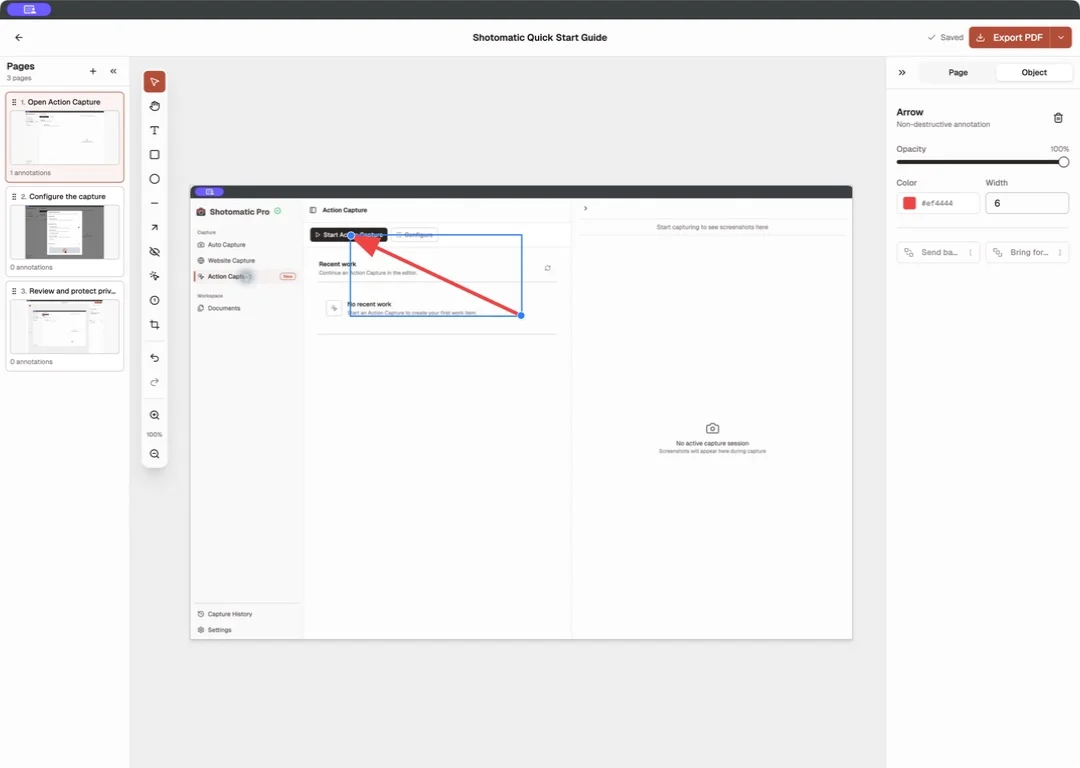
This guide covers how to turn screenshots you already have into an ordered set of instructions on Mac. You will select the useful images, import them into a Document, put the pages in task order, write the page text, add necessary visual cues, and check the exported result.
1. Select the screenshots the guide needs
Start with one task and keep one screenshot for each action or result the reader must see. Remove duplicate states, loading screens, and images that do not change the instruction.
Before importing, check every screenshot for customer names, email addresses, account details, notifications, and unrelated windows. Recapture a clean screen when possible. Redaction should be the fallback, not the first privacy step.
Use numbered filenames only when they make the initial order easier to recognize:
01-open-settings.png
02-select-notifications.png
03-disable-weekly-email.png
These filenames are for organization. The page titles inside the guide should tell the reader what to do.
2. Create a Document from Images
Open Documents, choose New Document, and select Images. Pick the screenshot files on your Mac. Shotomatic adds each imported image as an editable page.
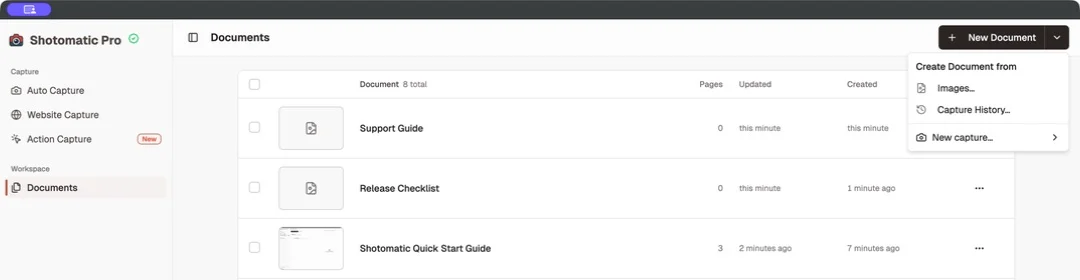
If you captured the screenshots in an earlier Shotomatic session, choose Capture History instead. The new Document stays separate from that source session, so you can edit the guide without changing the original capture record.
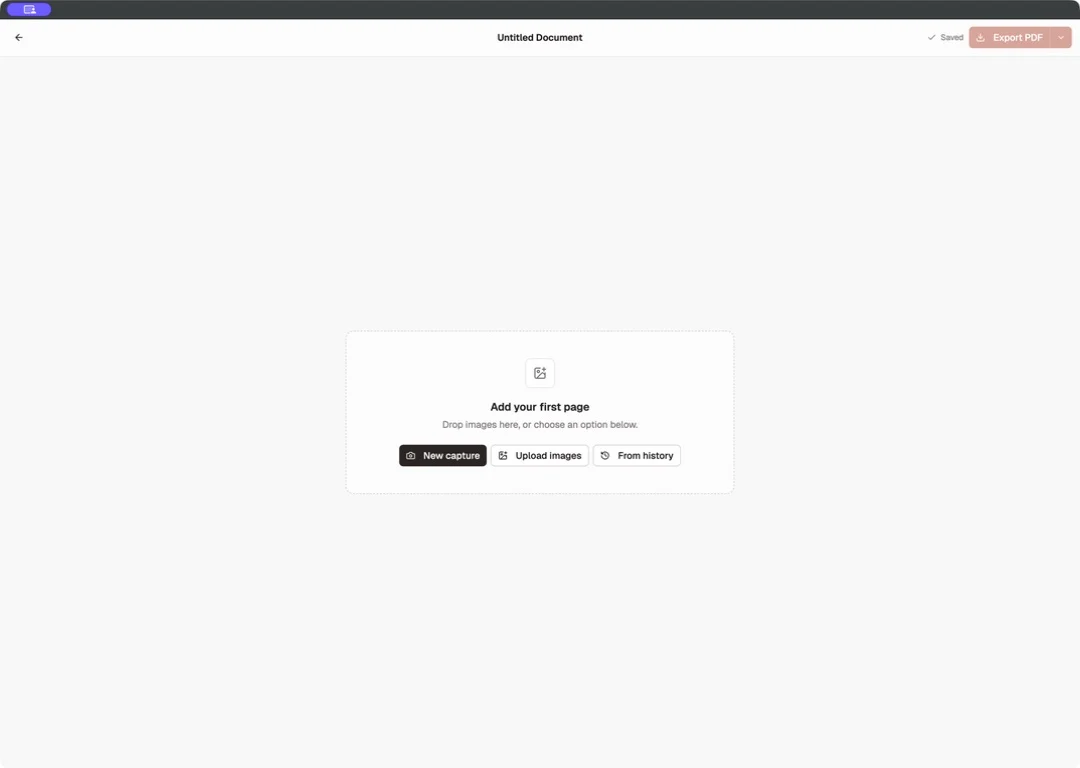
An empty Document also keeps the three main starting points visible: images on your Mac, Capture History, or a new capture.
3. Put the pages in task order
The page order should match the order in which the reader completes the task. Drag pages into place, remove unnecessary screens, and duplicate a page only when the same screen needs two different instructions.
Read the page list from top to bottom without opening the images. If the sequence is not clear from the titles alone, the guide still needs work.
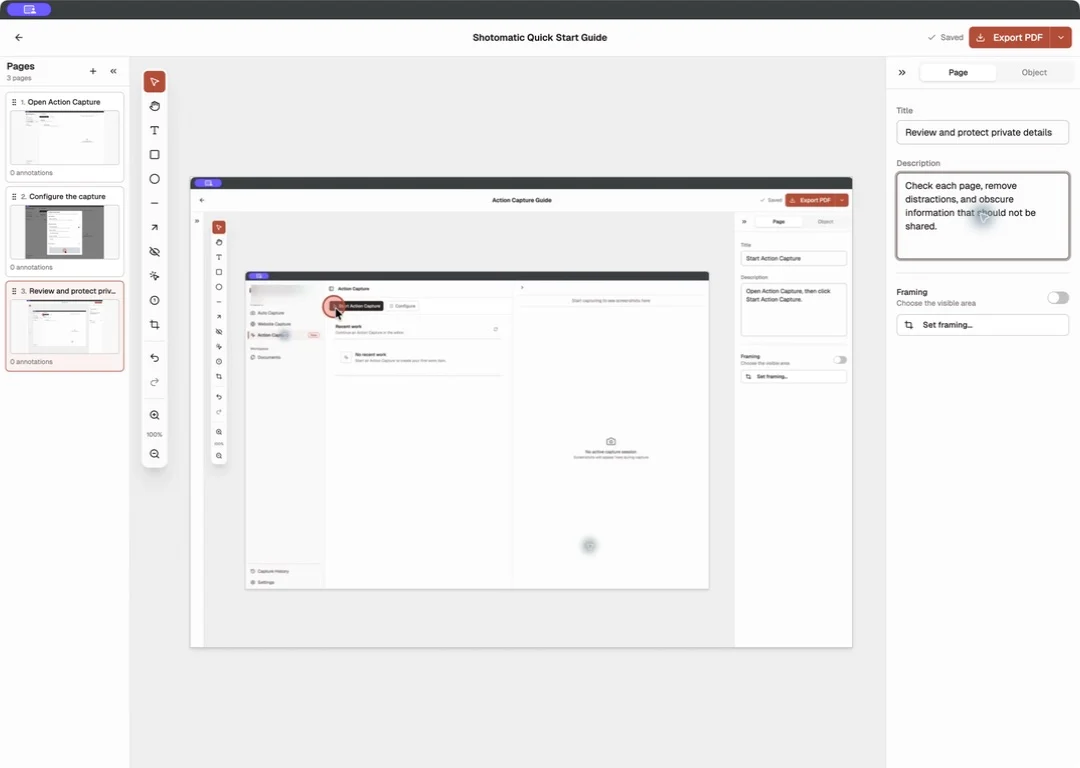
Keep one main action on each page. A page that asks the reader to open a menu, choose an option, and confirm a dialog should usually become three pages because each action changes the screen.
4. Write a direct title for every page
Each page title should state the action, not label the screen. Use a verb and the exact control name where possible.
| Weak title | Clear title |
|---|---|
| Settings screen | Open Settings |
| Notifications | Select Notifications |
| Weekly emails | Turn off Weekly summary |
Use the description for information the screenshot cannot show: a prerequisite, the expected result, or a warning. Do not restate what is already visible.
For example:
- Title: Select Notifications
- Description: This setting is available to workspace administrators.
This pattern keeps the visual documentation scannable while preserving the context needed to complete the task.
5. Add only the visual cues the reader needs
Add an annotation when the target is easy to miss, when several similar controls appear together, or when the reader must avoid a nearby option. An arrow or short text label is often enough.
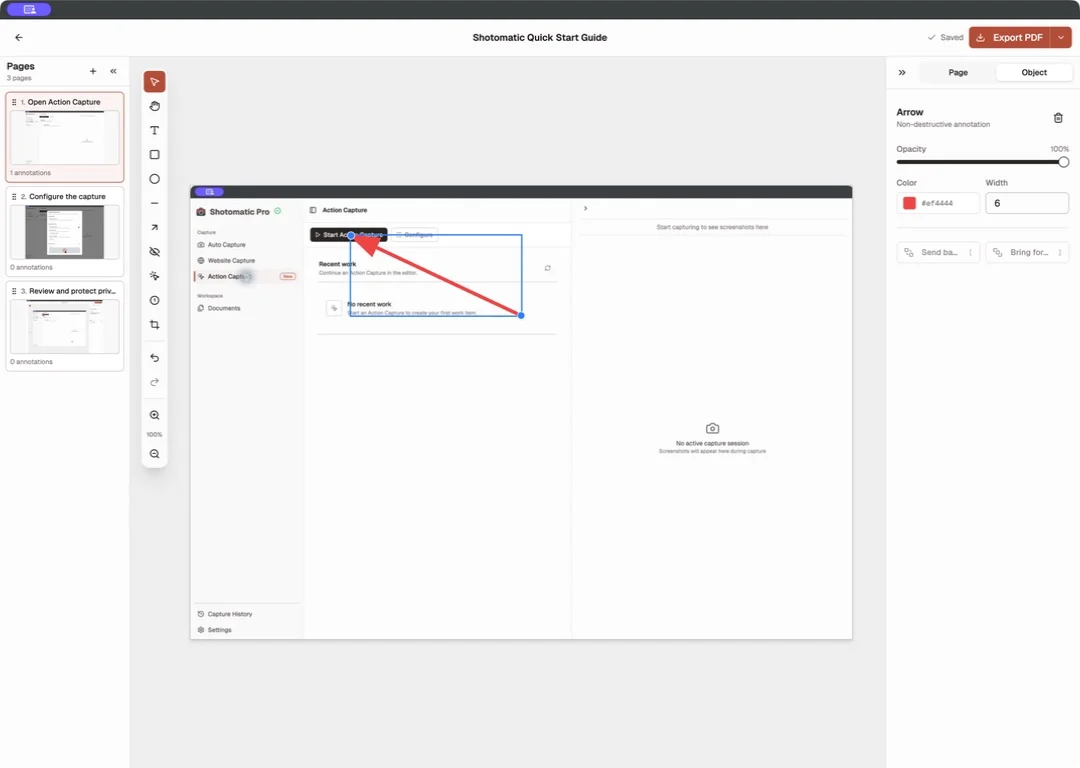
Free includes Text, Rectangle, Ellipse, Line, Arrow, Framing, and Action Focus. Pro adds Blur, Click Marker, and Step Numbers. The separate screenshot annotation guide explains when each type helps and when it becomes visual noise.
Do not place an arrow on every page by habit. If the title and screenshot already make the target obvious, the annotation adds nothing.
6. Export and inspect the finished guide
Export the Document as PDF when the reader needs one ordered file. Choose PNG, JPG, or WebP when the pages will be inserted into a help center, wiki, or presentation. ZIP keeps the exported page files together.
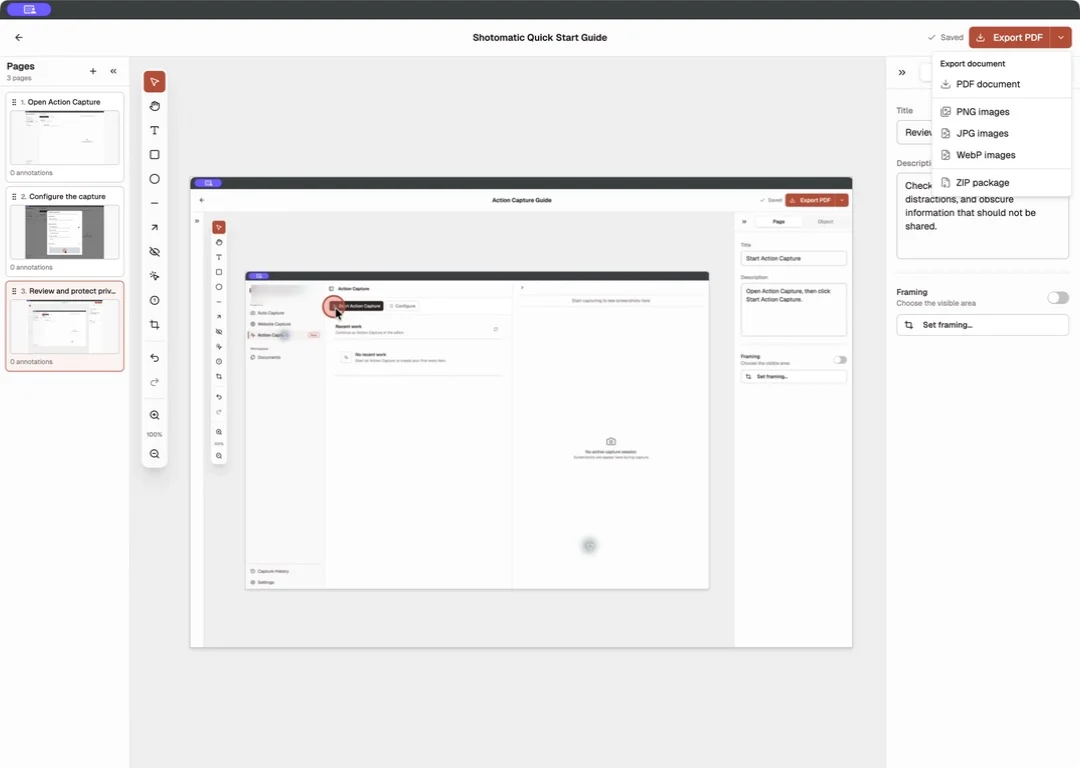
Free and Pro can export PDF, PNG, JPG, WebP, and ZIP. After export, open the actual output and check:
- the first and last page;
- the complete page order;
- every title and description;
- small annotation text at normal viewing size;
- any framing or Action Focus crop;
- private details that may have been missed.
If the only goal is to combine images into one file, use the shorter guide to save screenshots as a PDF on Mac. Use a Document when the screenshots also need editable page order, instructions, and visual guidance.
Capture the next guide from clicks
Importing is the right path when the screenshots already exist. For a new software task where each click defines the next step, Action Capture can collect the sequence while you work and open it as a Document afterward.
The final editing rule is the same for both routes: one task per guide, one main action per page, and only enough text or annotation to make that action clear.
Frequently Asked Questions
Related posts
See more postsHow to Create a Step-by-Step Guide from Clicks on Mac
Create a step-by-step guide on Mac by capturing meaningful clicks, marking each action, editing the steps, and exporting images or a PDF.

How to Annotate Screenshots for Clear Instructions on Mac
Use click markers, arrows, shapes, text, crop, and blur to make instructional screenshots clear without covering important context.
How to Document a Product Walkthrough with Automated Screenshots on Mac
Capture a timed product walkthrough on Mac, turn the useful frames into an editable guide, add page instructions, and export the result.
PDF Guide vs Online Knowledge Base Article
Choose a PDF guide or online knowledge base article based on distribution, updates, search, access, offline use, printing, and ownership.

Fix the affected pages without rebuilding the whole PDF
Use Shotomatic Documents to replace, reorder, and review permitted pages before exporting a corrected PDF on your Mac.