How to Create a Step-by-Step Guide from Clicks on Mac
Create a step-by-step guide on Mac by capturing meaningful clicks, marking each action, editing the steps, and exporting images or a PDF.

This guide shows how to turn a task on your Mac into step-by-step visual documentation. You will define one task, prepare the screen, capture each meaningful click, review the sequence, edit the pages, and export the finished guide as images or a PDF.
TL;DR: Give each required action one clear screenshot, mark where the click happened, remove redundant steps, and add only the context the reader needs to continue.
Choose one task for the guide
A useful guide begins at a defined starting point and ends with one completed task. "Change your profile photo" is a task. "Learn account settings" is a collection of tasks and should become several guides.
Write the task as a short sequence before you capture anything. For example:
- Open account settings.
- Select the profile section.
- Choose a new image.
- Save the change.
- Confirm that the new image appears.
This outline tells you which clicks matter. It also gives you a quick way to check whether the finished guide is missing a step.
Prepare the screen for capture
Preparing the screen first saves editing time later. Before the session, put the app in the same state the reader will see and remove anything that should not appear in the guide.
- Use a test account or sample data.
- Close notifications and unrelated windows.
- Remove personal information and customer data.
- Use a consistent window size throughout the task.
- Dismiss popups that are not part of the instructions.
Run through the task once without capturing it. A rehearsal exposes missing access, unexpected dialogs, and slow screens before they become part of the screenshot sequence.
Capture one screenshot for each meaningful click
The capture should follow the actions in your outline. If you work manually, take a screenshot after each click that the reader must repeat and name the files in order. This works for a short guide, but it interrupts the task every time you save an image.
A click-based step recorder removes that interruption. Start the capture and complete the task. Each accepted click saves the target state immediately before the action, so the sequence follows the task rather than a timer.
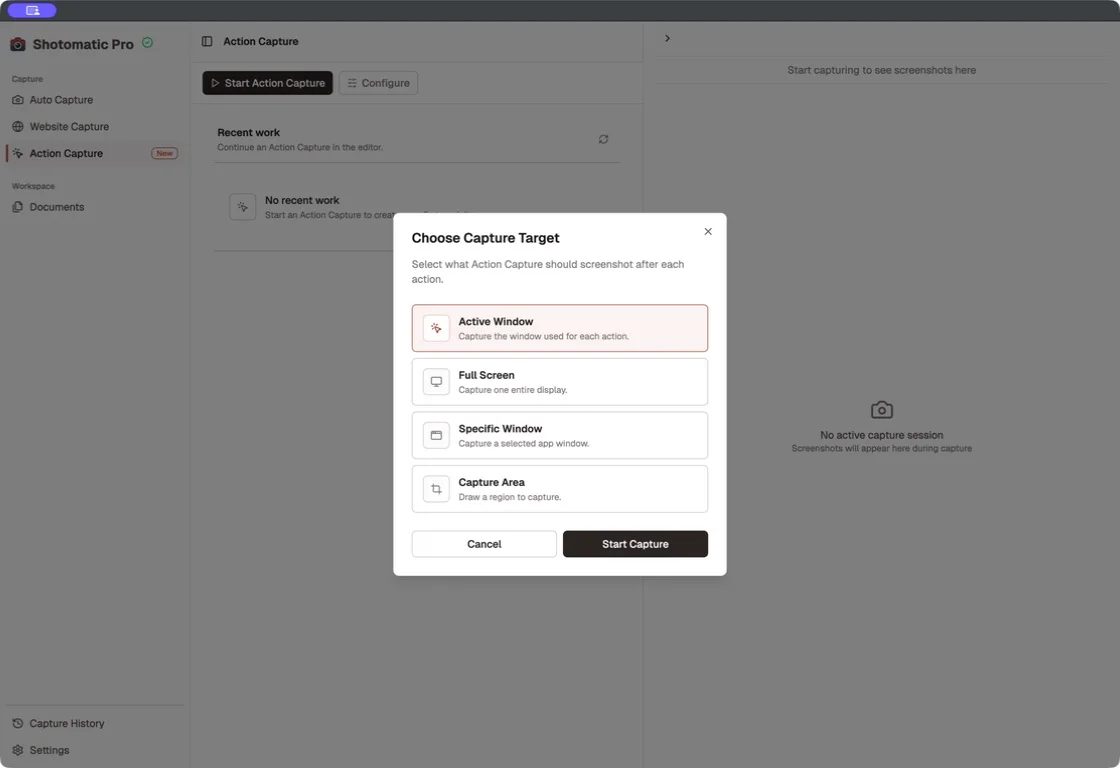
Choose the capture target that matches the task. Active Window follows the window used for each action, while Specific Window and Capture Area keep every step framed consistently.
Do not add clicks just to make the guide look more detailed. Opening the right menu, choosing an option, and confirming a change may each need a step. Moving focus between fields or closing an irrelevant popup usually does not.
Mark where each click happened
A screenshot shows the interface state, but it may not show which control the reader should use next. Marking the click location connects the image to the action.
Check that the marker does not hide the selected control or its label. If several similar controls appear on screen, pair the marker with a short instruction such as "Select Notifications" or "Choose PDF."
Use the marker to show where the reader acts on the screen. Put longer explanations in the step text or an annotation.
Review the screenshots in order
Read the captured sequence from the perspective of someone completing the task for the first time. Each screenshot should make the next action clear without forcing the reader to infer a missing screen.
Remove screenshots that repeat the same action, show an accidental click, or add no useful information. Keep a confirmation screen when it proves the task worked. If two screenshots need the same instruction, one of them may be unnecessary.
Write each step with a direct verb:
- Open Settings.
- Select Notifications.
- Turn on Weekly summary.
- Select Save.
Avoid narrating details the screenshot already makes obvious. The text should identify the action, while the image provides the visual context.
Add annotations where the click marker is not enough
Annotations are useful when the reader needs to notice a result, enter a particular value, or avoid a nearby control. Add them after you have removed redundant screenshots so you do not spend time editing a frame that will not appear in the guide.
Keep each screenshot focused on one instruction. Several arrows, labels, and notes on one image usually mean the step should be divided or the text should carry more of the explanation.
Check every annotation at the size readers will see in the final output. Small text and thin marks can look clear in an editor but become hard to read after export.
Export and check the finished guide
Export separate PNG, JPG, or WebP pages when the screenshots will be inserted into a help center or another document. Export a PDF when the reader needs one ordered file, or use ZIP to package the pages together.
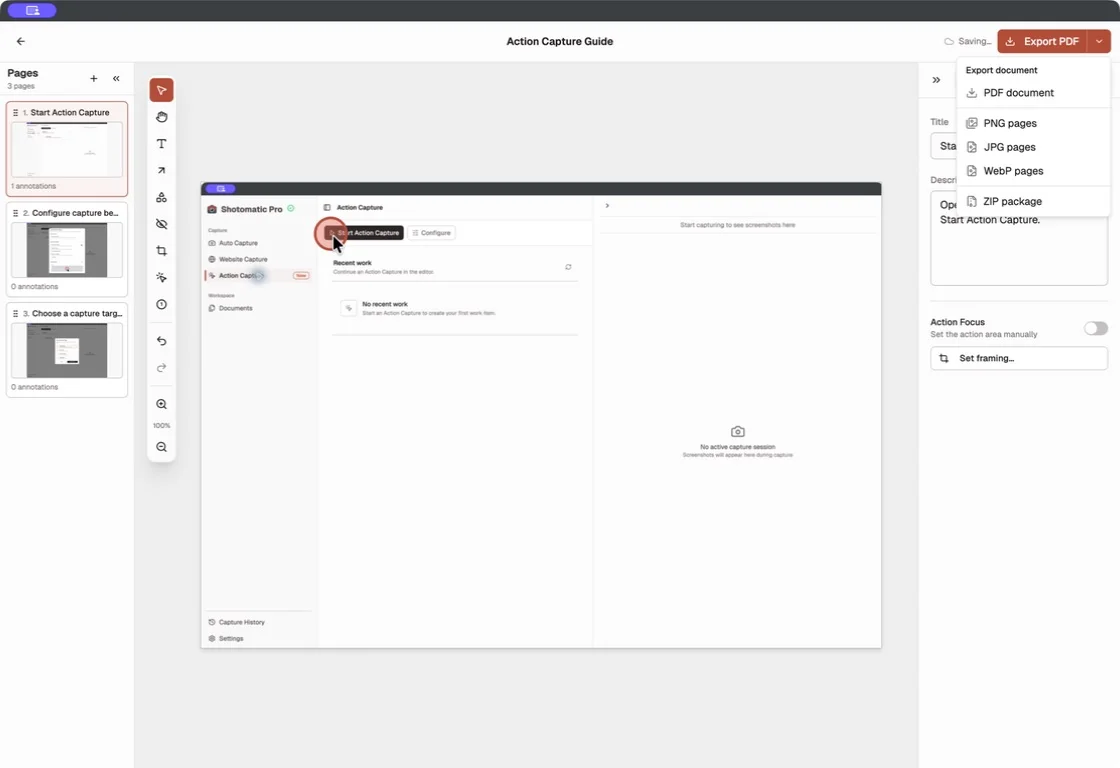
Open the exported images or document and follow the guide from the first step to the last.
Check that:
- the pages or files are in the right order
- click markers do not cover labels
- annotations remain readable
- no screenshot exposes private information
- the final page confirms the intended result
If the output covers more than one task, split it before sharing. Short, task-specific guides are easier to scan and easier to replace when the interface changes.
Create the guide with Shotomatic Action Capture
Shotomatic Action Capture keeps capture, review, editing, and export in one workflow. Each accepted click saves the target state and records the click location, so you can complete the task without stopping to save and name each image.
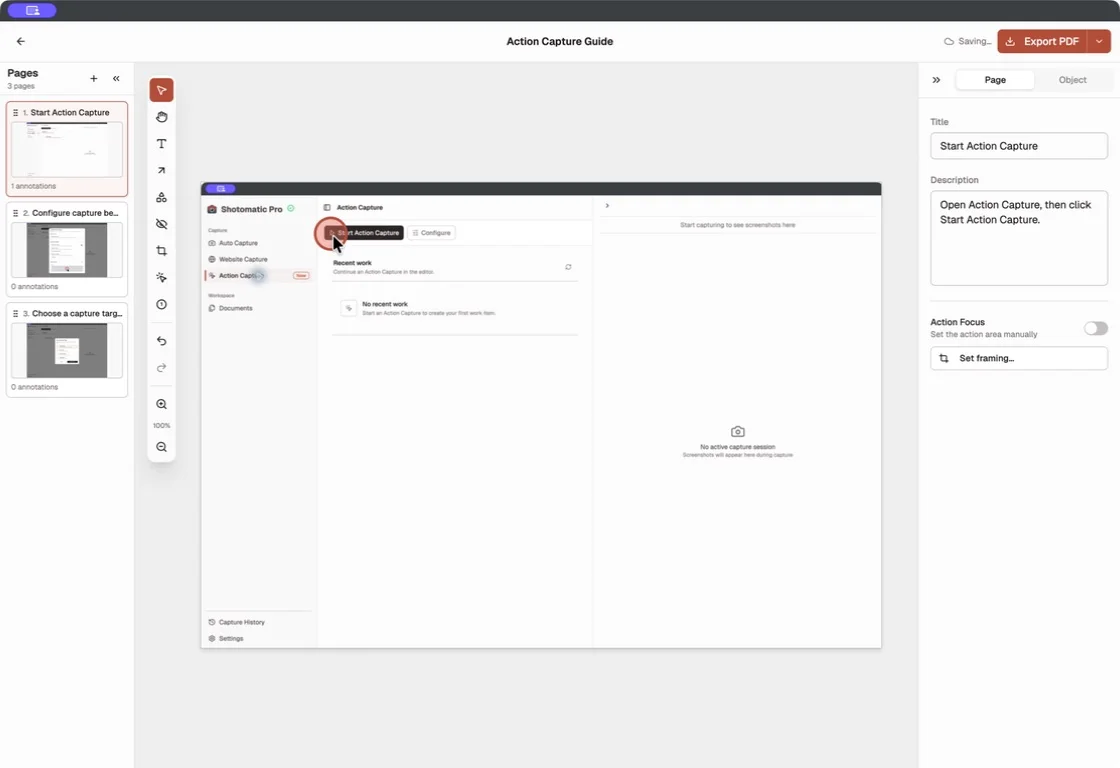
The editor keeps the captured pages, annotation tools, page text, and Action Focus controls in one view. Review the sequence before adding detail so the final guide contains only the steps the reader needs.
Free users can save up to 5 steps per session and any number of guides. Free editing includes page organization, titles and descriptions, text, rectangles, ellipses, lines, arrows, Framing, Action Focus, undo, and redo. Every document export format is available on Free.
Pro removes the per-session step limit and adds Blur, Click Marker, and Step Numbers. If a Free session reaches 5 saved steps, Shotomatic saves the fifth step and pauses. You can open the current document or activate Pro and continue the same session.
Read more about Action Capture and the shared Documents editing workflow. If you are deciding between still instructions and video, compare a step-by-step screenshot guide with a screen recording. For capture based on a timer instead of clicks, see Screenshot Automation on Mac. For a timed approach to a longer product flow, read How to Document a Product Walkthrough with Automated Screenshots on Mac. For current plan details, see pricing.
FAQ
How can I take a screenshot every time I click on a Mac?
Use a click-based capture tool that treats accepted mouse clicks as triggers. Shotomatic Action Capture saves the target state immediately before each accepted click, marks its location, and keeps the steps together for review and editing.
Is a step-by-step screenshot guide better than a screen recording?
Use a screenshot guide when readers need to follow a task at their own pace or find one specific step quickly. Use screen recording when motion, exact timing, or audio is part of the explanation.
How many screenshots should a step-by-step guide include?
Use one screenshot for each action the reader must understand. Remove repeated screens and clicks that do not change what the reader needs to see. If a guide covers several separate tasks, split it into smaller guides.
Can I edit the screenshots before exporting the guide?
Yes. Free includes page organization, titles and descriptions, text, shapes, lines, arrows, Framing, and Action Focus. Pro adds Blur, Click Marker, and Step Numbers. Both plans export PDF, PNG, JPG, WebP, and ZIP.
Related posts
See more postsHow to Document a Product Walkthrough with Automated Screenshots on Mac
Capture a timed product walkthrough on Mac, turn the useful frames into an editable guide, add page instructions, and export the result.
Step-by-Step Guide vs Screen Recording: Which Should You Use?
Choose between a screenshot guide and screen recording for tutorials, support, and documentation based on motion, audio, editing, and reader needs.
What Is Screenshot Automation on Mac?
What screenshot automation means on Mac, how it differs from manual screenshots and screen recording, and when a dedicated capture workflow starts to matter.
How to Plan a Screenshot-Based Software Documentation Set
Plan a maintainable software documentation set with clear page types, task ownership, screenshot rules, naming, navigation, and reviews.
Turn your clicks into a clear step-by-step guide
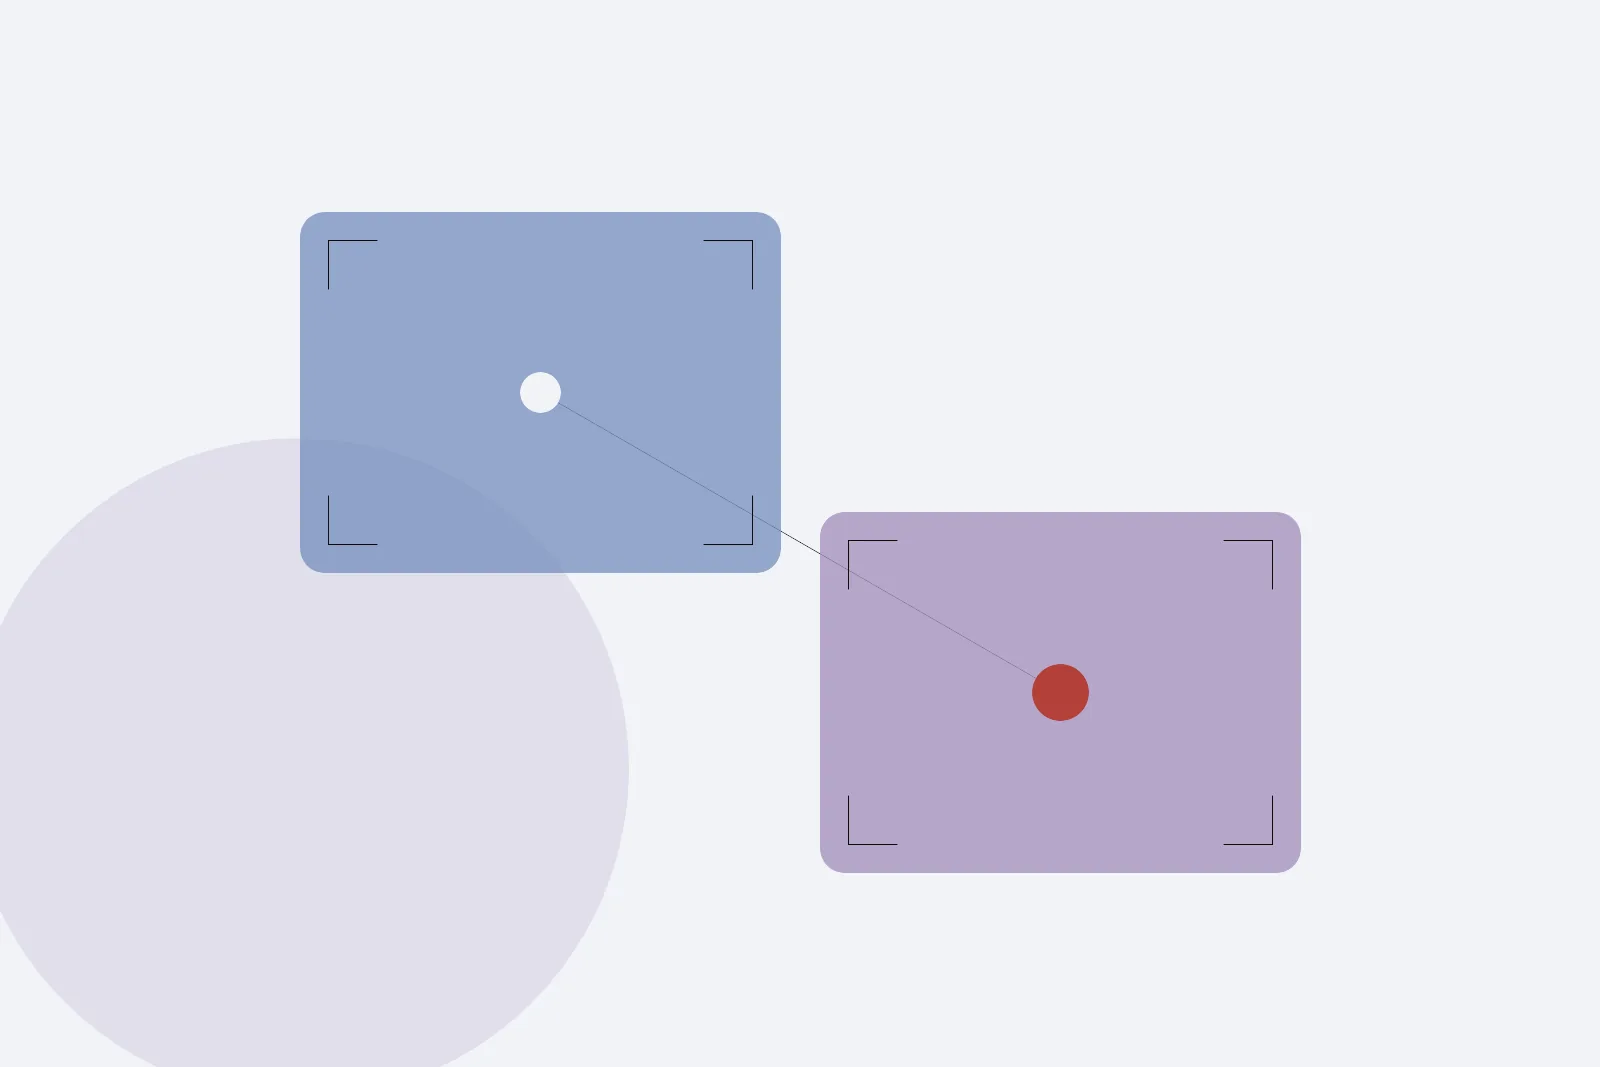
Action Capture records each click as an ordered step, then lets you edit and export the guide on your Mac.